Assigning User Permission in SharePoint 2010

If you are a Network Administrator in your company and would like to give a limited access or proper permission to the Intranet Users, I have prepared this Tutorial to walk you through the process of assigning the proper permission to the Users, whether you wish to grant a Full Control, Full Read, Deny Write, Deny All or a Customized permission.

To begin, open SharePoint 2010 Central Administration, click on Central Administration, click on Application Management then click on Manage web applications.

Central Administration

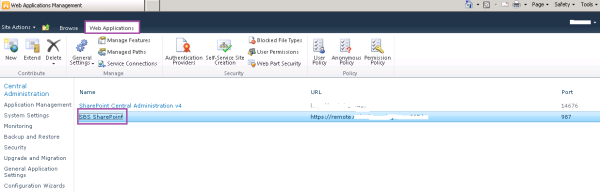
In the Web Applications Tab, click on the SharePoint site name (SBS SharePoint).

Web App Mgmnt

In the Web Applications Tab, click on the User Policy, then click on Add Users.

Web App Mgmnt 2

In the Add Users page, select the Zone, in this tutorial we will select Intranet, click on Next to Continue.

Add Users

In the Add Users page, type the Active Directory User that you wish to give the proper permission to, then click on Finish.

Add Users-Read Access

This concludes the Tutorial in Assigning User Permission in SharePoint 2010.

Note: You may to go back from the Policy for Web Application page to edit the User’s permission if needed.

Installing Roles and Features in Windows Server 2012

Access the Server Manager App from the Metro UI.  In this Tutorial we will be installing Print and Documents Services roles and features, you may use this guide to add any roles and features that you wish to add in Windows Server 2012.

From the Server Manager’s Dashboard and in the Welcome to Server Manager page, click on Add roles and features

In the Add Roles and Features Wizard page, click on Next to proceed

In the Select installation type page select the installation type that you wish, in this Tutorial we will choose Role-based or feature-based installation then click on Next to continue

In the Select destination server page select a server or a virtual hard disk on which to install roles and features, click on Next to continue

You may add any additional features if you wish then click on Add Features to continue

In the Select server roles page Print and Document Services should be selected then click on Next to continue

In the Print and Document Services page click on Next to continue

In the Select role services page, select additional role services that you wish to install then click on Next to continue

In the Confirm installation selections page, you may wish to check the box to ‘Restart the destination server automatically if required’, otherwise click on Install to continue

In the Installation progress page, you may view the results and this concludes adding the Roles and Features.

Note: If there are any errors during this process, make sure to view the Event Viewer logs for any errors and hints for the resolutions of the issue(s).

Please check out my other Tutorial on Remove Roles and Features in Windows Server 2012.

How to Restore a Backup using the Windows Server Backup feature in Windows Server 2008 Enterprise R2

Open up the Windows Server Backup (Click on Start and type backup, click on Windows Server Backup on the top).  Select Recover on the right navigation pane.

In the Getting Started page, select ‘A backup stored on another location’ and click on Next to continue.

In the Specify Location Type page, select Remote shared folder, you may wish to choose another location type and click on Next to continue.

In the Specify Remote Folder page type the Universal Naming Convention (UNC) to the remote folder then provide the credentials, click on Next to continue.

In the Select Server page, select which server’s data that you wish to recover, click on Next to continue.

In the Select Backup Date, select the backup date to be used for recovery and click on Next to continue.

In the Select Recovery Type select which want you wish to recover. In this Tutorial we’ll be selecting Files and folders and click Next to continue.

In the Select Items to Recovery page, locate the items that you wish to recover. In this Tutorial please click on Recovery and click on Next to continue.

In the Specify Recovery Options page, choose Another location, click on Browse and select the location, click on Next to continue.

In the Confirmation and final page of the recovery wizard, click on Recover, this conclude your backup restore.

Note: You may also use this Tutorial in SBS 2011.

Please check out How to use the Windows Server Backup in Windows Server 2008 Enterprise R2

How to use Windows Server 2008 Backup

To begin…..Make sure that Windows Server Backup server feature is installed. You may confirm this by going into the Server Manager and locate Features. If it’s not installed please follow this guide. Open up the Server Manager and click on Add Features and Run the Add Features Wizard to add the Windows Server Backup.

You will see this page when the Add Features Wizard has been successfully completed.

Open up the Windows Server Backup (Click on Start and type backup, click on Windows Server Backup on the top). Select the Backup Schedule on the right navigation pane.

In the Getting Started page, click on Next to continue.

In the Select Backup Configuration page, you may either select Full Server (recommended) or Custom, click on Next to continue.

In the Select Items for Backup page, you may select what you want to backup, click on Next to continue.

In the Specify Backup Time page, choose the appropriate backup – how often and what time you want your backup to start, click on Next to continue.

In the Specify the Destination Type page, choose the location where you want to store your backup, click on Next to continue. You may choose a remote backup and opt out to back up to an external hard drive, we will use a Network Attached Storage (NAS) device in this Tutorial, click on Next to continue.

In the Specify Remote Shared Folder page, type the location of the NAS, click on Next to continue.

You will have to provide the User Name and Password of the NAS or the remote backup location, click on Next to continue.

In the Confirmation page, click on Finish to conclude the backup wizard.

Note: You may also use this Tutorial in SBS 2011.

Please check out  How to Restore a Backup using the Windows Server Backup feature in Windows Server 2008 Enterprise R2